
I wanted to write a blog on how to prepare your horse and rider for your equestrian fine art session. It is such an exciting time when you decide to get professional photos taken with your horse, and I want them to be as outstanding as possible! This blog post will walk you through all the steps you’ll need to have the best session!
If you want to view more equestrian portrait sessions, click here. If you want to view a Pinterest board with outfit ideas linked for your session, click here!
Bathing Timeline
5-7 Days before is the best time to start prepping your horse for your session.
- Give your horse a good bath with quality shampoo.
- Deep condition and detangle your horse’s mane and tail (mane and tail shampoo is my favorite!).
- Remove stains on your horse when they are fresh.
- Trim whiskers, fetlock, ears, or bridle path (if that’s your preference) several days beforehand so everything looks natural instead of freshly trimmed.
- Schedule farrier work at least a week before if your horse needs new shoes.
Why do this several days ahead? Because a freshly washed coat sometimes looks “fluffy”. After a few days of grooming, the natural oils return, creating a rich shine that photographs beautifully. This will make your horse look beautiful for your equestrian session together!
2-3 Days Before.
- Brush thoroughly every day.
- Apply fly spray carefully to avoid buildup.
- Touch up any new stains rather than re-bathing your entire horse.
- Wash white socks or markings if necessary.
- Keep your horse blanketed or use a sheet if the weather allows to help keep them clean.
The Night Before.
This is usually the ideal time for:
- Washing white legs.
- Spot-cleaning stains.
- Detangling and conditioning your horse’s tail.
- Braiding the tail (optional) to keep it clean overnight.
- Lightly braiding the mane if needed to keep it neat.
Avoid heavy silicone sprays the night before—they tend to attract dust.
The Morning of your Session
2–3 Hours Before
- Curry thoroughly to bring natural oils to the surface of their coat.
- Brush with a soft body brush.
- Wipe eyes, nose, and dock with a clean cloth.
- Clean hooves.
- Polish hooves only if you like that look (many photographers prefer a natural finish).
30 Minutes Before
- Remove any overnight braids.
- Fluff the tail.
- Apply coat polish only to the hindquarters, shoulder, and neck, avoiding the saddle or bridle areas.
- Give one final dusting with a microfiber cloth.
Things to Avoid Right Before Your Session
❌ A full bath unless it’s absolutely necessary.
❌ Heavy show sheen over the entire horse (it can create glare in sunlight).
❌ Oily fly spray on the face.
❌ Fresh clipping immediately before the session.
Bonus Tips for White Horses
Grey and light-colored horses often benefit from:
- Bathing 2–3 days before
- Washing white legs again the night before and using purple conditioners (the purple strips out yellow and green grass stains)
- Spot cleaning the morning of
- Keeping them stalled or blanketed as much as possible before leaving for your shoot
Photographer’s Pro Tip
The most photogenic horses are rarely the ones bathed an hour before the session. They’re usually the ones that have been bathed 3–5 days earlier and then meticulously groomed every day leading up to the shoot. That routine creates a deep, healthy shine that catches light beautifully and requires much less editing afterward! They will be the star of the show for your equestrian session!
Mane Pulling or Braiding:
Mane Pulling
A freshly pulled mane often looks blunt, uneven, or obviously shortened in photographs. If your horse’s mane needs pulling or thinning:
- Pull it 1–2 weeks before your session.
- Give it time to soften and settle naturally.
- Avoid pulling the day before or the day of your session.
If your horse has a naturally thick mane, simply thinning it slightly is often enough to create movement without making it look sparse.
Should You Braid The Mane?
It depends on the look you’re hoping to achieve. If you are a Hunter/Jumper and are wanting elegant, fine art portraits, braiding the mane can have a beautiful and sharp look. Braiding the mane looks elegant as large fine art images printed in your home.
The first thing to consider: Leaving it Natural
Leaving it natural is perfect for:
- Liberty portraits
- Fine art sessions
- Black background portraits
- Lifestyle sessions
- Horses with long, flowing manes
A clean, brushed mane blowing gently in the wind creates beautiful movement and a timeless feel.
A Running Braid
Ideal for:
- Adventure sessions
- Mountain or beach rides
- Portraits where you want to show off the neck
A loose running braid keeps the mane tidy while still looking elegant and natural.
Button Braids
Best for:
- Dressage horses
- Formal portraits
- Horses wearing show attire
- Magazine-style images
If choosing button braids:
- Have them done by someone experienced.
- Keep them neat and evenly spaced.
- Avoid loose or lopsided braids—they’re much more noticeable in photographs than in person.
The Night Before:
If leaving the mane down:
- Brush thoroughly.
- Apply a small amount of conditioner if needed.
- Put the mane into large, loose braids overnight to reduce tangles and waves.
- Remove the braids several hours before the session so the hair can relax.
Avoid tiny overnight braids—they leave obvious crimp marks that can last all day.
The Morning of the Session
- Brush from the bottom up using a detangler.
- Remove shavings, hay, and burrs.
- Lay the mane naturally on the preferred side.
- Use a damp cloth instead of heavy products to tame flyaways.
A little polish goes a long way. Too much product can make the mane look greasy and reflect light unnaturally.
Don’t Forget the Forelock
The forelock frames your horse’s face just like bangs frame a person’s. Before your session:
- Remove tangles carefully.
- Check for burrs or hay.
- Allow it to fall naturally.
- Avoid trimming it right before the session unless it’s part of your horse’s regular look.
A full, healthy forelock often adds softness and personality to portraits.
A Photographer’s Perspective:
The mane should complement your horse—not distract from them. Whether it’s flowing freely in the breeze, styled in a graceful running braid, or finished with immaculate button braids, the best choice is the one that reflects your horse’s personality and the story you want your portraits to tell.
For most portrait sessions, I encourage clients to aim for natural, clean, and polished rather than overly perfect. Timeless photographs capture your horse as you know and love them, with just enough grooming to let their beauty shine.
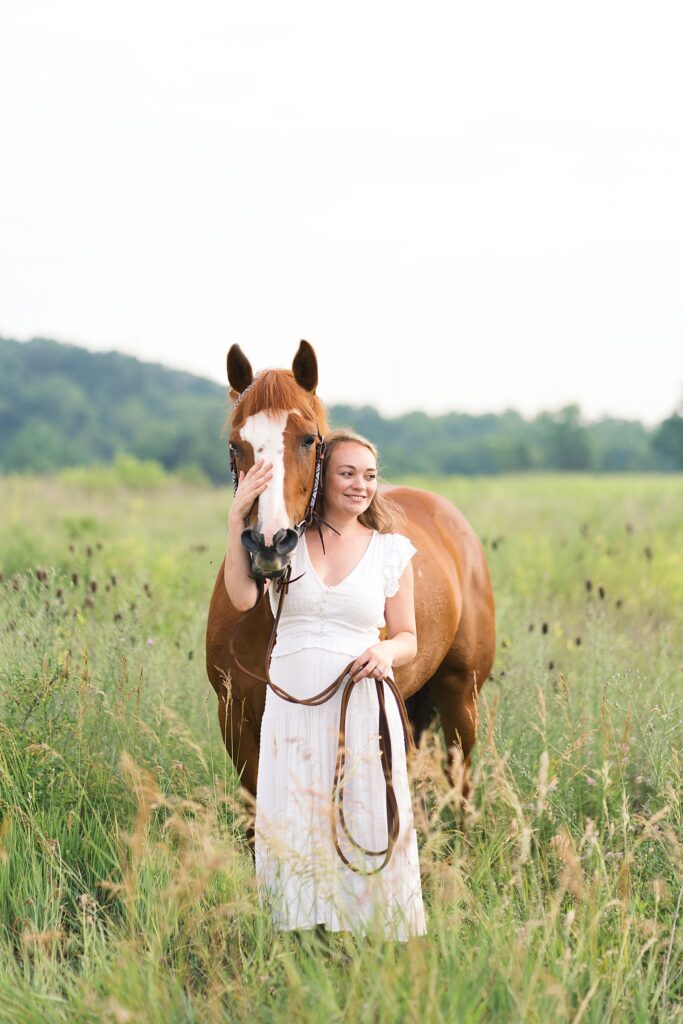
Preparing yourself for your session
1. Choose Clothing That Complements Your Horse
Your outfit should tell the story you want your portraits to tell.
- Stick with timeless, neutral colors like cream, beige, olive, navy, chocolate, black, dusty blue, or muted earth tones.
- Avoid neon colors, busy patterns, stripes (small or large), and anything with brands or logos.
- Layers photograph beautifully—think knit sweaters, flowing dresses, tailored jackets, or linen shirts.
- Coordinate with your horse’s color instead of matching exactly.
- Incorporate your riding helmet if you’re dressing in your uniform, or your favorite hat to complement your outfit.
Quick Color Complement Guide
- Black horse → Cream, blush, camel, emerald
- Chestnut → Navy, olive, cream
- Gray → Burgundy, dusty blue, forest green
- Palomino → Deep jewel tones
- Bay → Earth tones and soft neutrals
2. Wear Clothes That Let You Move
You’ll be walking, running, hugging your horse, and maybe even sitting in the grass. I always recommend flowy outfits or ones that stretch with you. Wear clothing that allows you to:
- Walk comfortably
- Mount if needed
- Kneel or sit on the ground beside your horse
- Move naturally
If you’re constantly adjusting your outfit, it’ll show in your photos.
3. Get Plenty of Rest
The night before:
- Drink plenty of water.
- Go to bed early and get a full night’s sleep.
- Avoid scheduling multiple stressful events beforehand.
You’ll look and feel fresher, and your expressions will be much more natural.
4. Keep Hair & Makeup Natural
Professional hair and makeup are wonderful but not required.
Aim for:
- Soft, natural makeup
- Lightly defined eyes
- Matte foundation (reduces shine)
- Neutral lip color
For hair:
- Soft curls
- Loose waves
- Low ponytail
- Elegant braid
If it’s windy, styles with a little structure tend to photograph best as they appear more natural.
5. Don’t Worry About Posing
This is one of the biggest concerns clients have, and I want to reassure you. You do not need to know how to pose! During your session, I’ll guide you through every step:
- Where to stand
- What to do with your hands
- Where to look
- How to interact naturally with your horse
The best photos happen when you’re focused on your horse—not the camera.
6. Arrive Early
Give yourself 20–30 extra minutes. This allows time to:
- Change clothes if needed
- Touch up hair
- Relax
- Let your horse settle into the environment
Nothing creates stress faster than arriving late.
7. Bring a Small Essentials Bag
Pack a few items:
- Hairbrush
- Hairspray
- Lip balm
- Makeup for touch-ups
- Lint roller
- Safety pins
- Water bottle
- Snacks
- Comfortable shoes for walking between locations
- Small rag for your horse to clean slobber or sweat
- Fly spray
8. Trust the Process
Your horse may:
- Pin their ears.
- Roll in the dirt.
- Refuse to stand still.
- Decide that the grass is more interesting than the camera.
This is completely normal! Some of the most meaningful images happen in the imperfect moments. We will work with your horse and whatever happens in the session. If they need a break, if they need to much or even if they need to trot in a circle to get out some energy, we’ll do it.
9. Focus on Your Connection
The goal for your session isn’t perfect poses. It’s about documenting the relationship between horse and rider. The quiet forehead touches, gentle hugs, laughing when your horse does something silly, or gazing at each other instead of at the camera.
Years from now, these are often the images you’ll treasure most.
10. Remember Why You’re Here
This session isn’t about perfection. It’s about preserving the relationship you’ve built through early mornings, muddy boots, long rides, quiet grooming sessions, victories, setbacks, and unconditional trust and love.
Those memories deserve to be documented exactly as they are.
Bonus Tips
Before your equestrian session, avoid:
- Fresh spray tans (they can appear orange on camera)
- Trying a brand-new hairstyle or makeup look
- Wearing brand-new boots that aren’t broken in
- Last-minute clothing decisions
Instead:
- Lay out your outfit a few days ahead.
- Steam or iron clothing the night before.
- Try everything on together to make sure it fits comfortably.
- Bring a backup outfit if you’d like variety.
A Final Thought
Your horse doesn’t care if your hair is perfect or your makeup is flawless for your equestrian session together. They know you by your voice, your touch, and the memories you’ve built together.
So, come ready to your equestrian session to love on your horse, laugh through the unexpected, and be fully present! I’ll take care of the rest for you so you can walk away with photographs that preserve not just how this season of life looked, but exactly how it felt.
- prepare horse for photos
- equine photography tips
- horse portrait preparation





+ Comments